
Thursday, August 15, 2013
New SWAG POSTERS!!
I did a post on my swag poster and I made a few variations for ya'll! I might even have to use one myself! Here they are. You can get them here.

Speeding Tickets
I found an idea like this on pinterest. But of course I made my own version. You have lots of kiddos the first semester that rush through their work and make silly mistakes or just plain messy!
I found a fun way to tell them they need to go back over it without the public humiliation. I just simply staple a speeding ticket onto their paper and place it back in their not done folder. Their name will appear on the Ketchup Board and they will know exactly what I want done. :) We will see how this works! I might even work into my point system if they don't get any speeding tickets for the week! YOU CAN GET IT HERE!

I found a fun way to tell them they need to go back over it without the public humiliation. I just simply staple a speeding ticket onto their paper and place it back in their not done folder. Their name will appear on the Ketchup Board and they will know exactly what I want done. :) We will see how this works! I might even work into my point system if they don't get any speeding tickets for the week! YOU CAN GET IT HERE!
Wednesday, August 14, 2013
Do your students have SWAG?
I found this idea somewhere out in pinterest land, of course. But I altered it a bit. I found myself last year saying things like: "Sit up straight" "Your brain doesn't work when its flat" ( laying head on desk) " Eyes on me" etc. So I implemented this idea and my students really responded well. If I saw any student not following those expectations I would just remind "Remember, we have SWAG here" Or "Aren't you SWAGALICIOUS" etc. I had to make it fun for them, not a rule. I am having a friend turn this in to a poster for me,... ( WE have a poster maker, but its only black and white... BLAH) When it is posted in my classroom I will post pictures. Click the picture to get it at my TPT store!

Monday, August 12, 2013
Classroom 2013-2014!!!!!!!
Howdy! It is T- minus 4 days until we begin staff development week. I have spent over three weeks off and on getting my classroom set up. OF COURSE, I changed a lot of things this year so I took tons of photos and I'm giving you a sneak peek!
This is the view from the door. We have suites so my room is the back room. You have to walk through my suitemates room first. The pictures are going to go counter clockwise around the room.


 These are our Whole Brain Teaching Rules. I created a sixth one that our school might be adopting.


 And we are all the way around the room, walls atleast. Here are my desk arrangements. This view is from the front of my classroom.

Another from the front. I have four tables.


 Bottom drawer. The empty white bins are for our Goals Journals that you can see about in this post.

That's it for now guys! Have fun getting your stuff ready. Let me know if you have any questions and I will be sure to post more soon. What do you think so far?????
This is what I put on the wall in between our suites as well. It is my multiplication graffiti wall. The kiddos get to sign each section when they have mastered that fact!
Word Wall!
If you notice I have a blue sparkly board to the left. It is my no name board!Here is a close up of that! Those are clothes pins I painted black and stuck to the sparkly paper I got from Hobby Lobby!
My Class Jobs Clip chart .
Next is the Turn in Table. Highlighters to help them remember their name. Box Tops can. Electronic Stapler. Both Math and Science turn in baskets. If you were absent box where I place extra copies. Construction paper and their privacy folders are in the little cubbies. Off to the left side is my "Drop Box". This is if they have any forms/notes/money/etc. to turn in.
Under the Turn in Table are the table baskets where I am going to store their notebooks and folders for Math and Science class. This way I don't have to worry about it not being brought to the room. It is already here. The clipboard is used to separate the different classes. the supply manager for each table will be in charge of grabbing it when they enter the room.
My Outstanding Work wall.
My teacher area.
My filing system behind my kidney table. I use the 10 drawer cart for copies of any worksheets/materials I will use that day. The bottom drawers have copies for future weeks. The smaller cart is my student files and teacher material files.
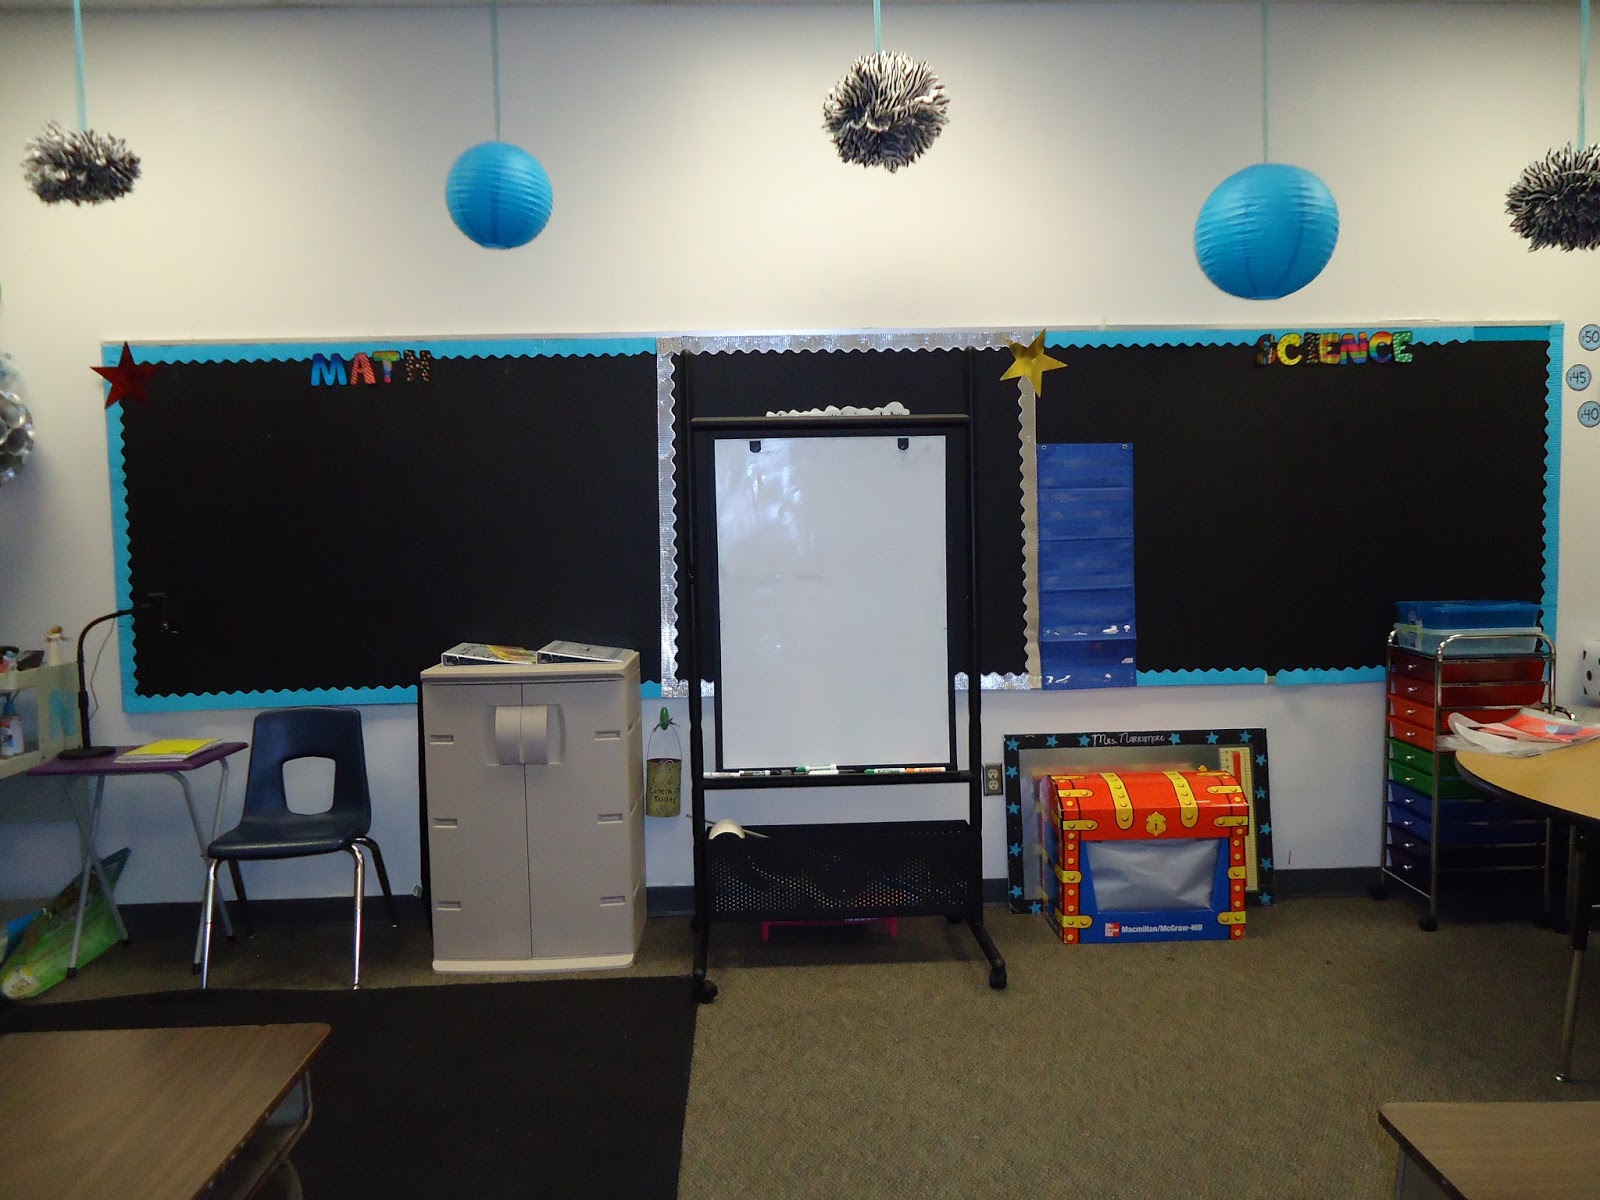
My Anchor Chart bulletin boards.And the mobile whiteboard is for when we do whole group instruction on the carpet ( which is not in the correct place, I'm just now noticing! It would be centered with the white board and Anchor chart boards.)
My Ticket out the Door poster. I will use sticky notes for quick assessing what they got that day. It is behind the mobile white board. The stars have the students numbers on them.
My station cabinet along with important binders that will need to be accessible. The bins I got at Walmart for 3.50 a piece.
My document camera area. The black hanging file thing is used to hold my class notebooks we do and any other items I expect the kiddos to have.
The camera area is right next to my teacher computer but we are going to skip over that. Next, is my Learn Bingo Board. For more information on how I use that, see this behavior management post from April 16,2013.
This is where my class pet Leopard Gecko will be located. The board behind him is for Anchor charts we use year long. The cabinet beneath it is used for extra tissues, sanitizer, construction paper, etc.
Next is my wonderful computer station! :) The table I did myself with DUCT TAPE YA'LL!
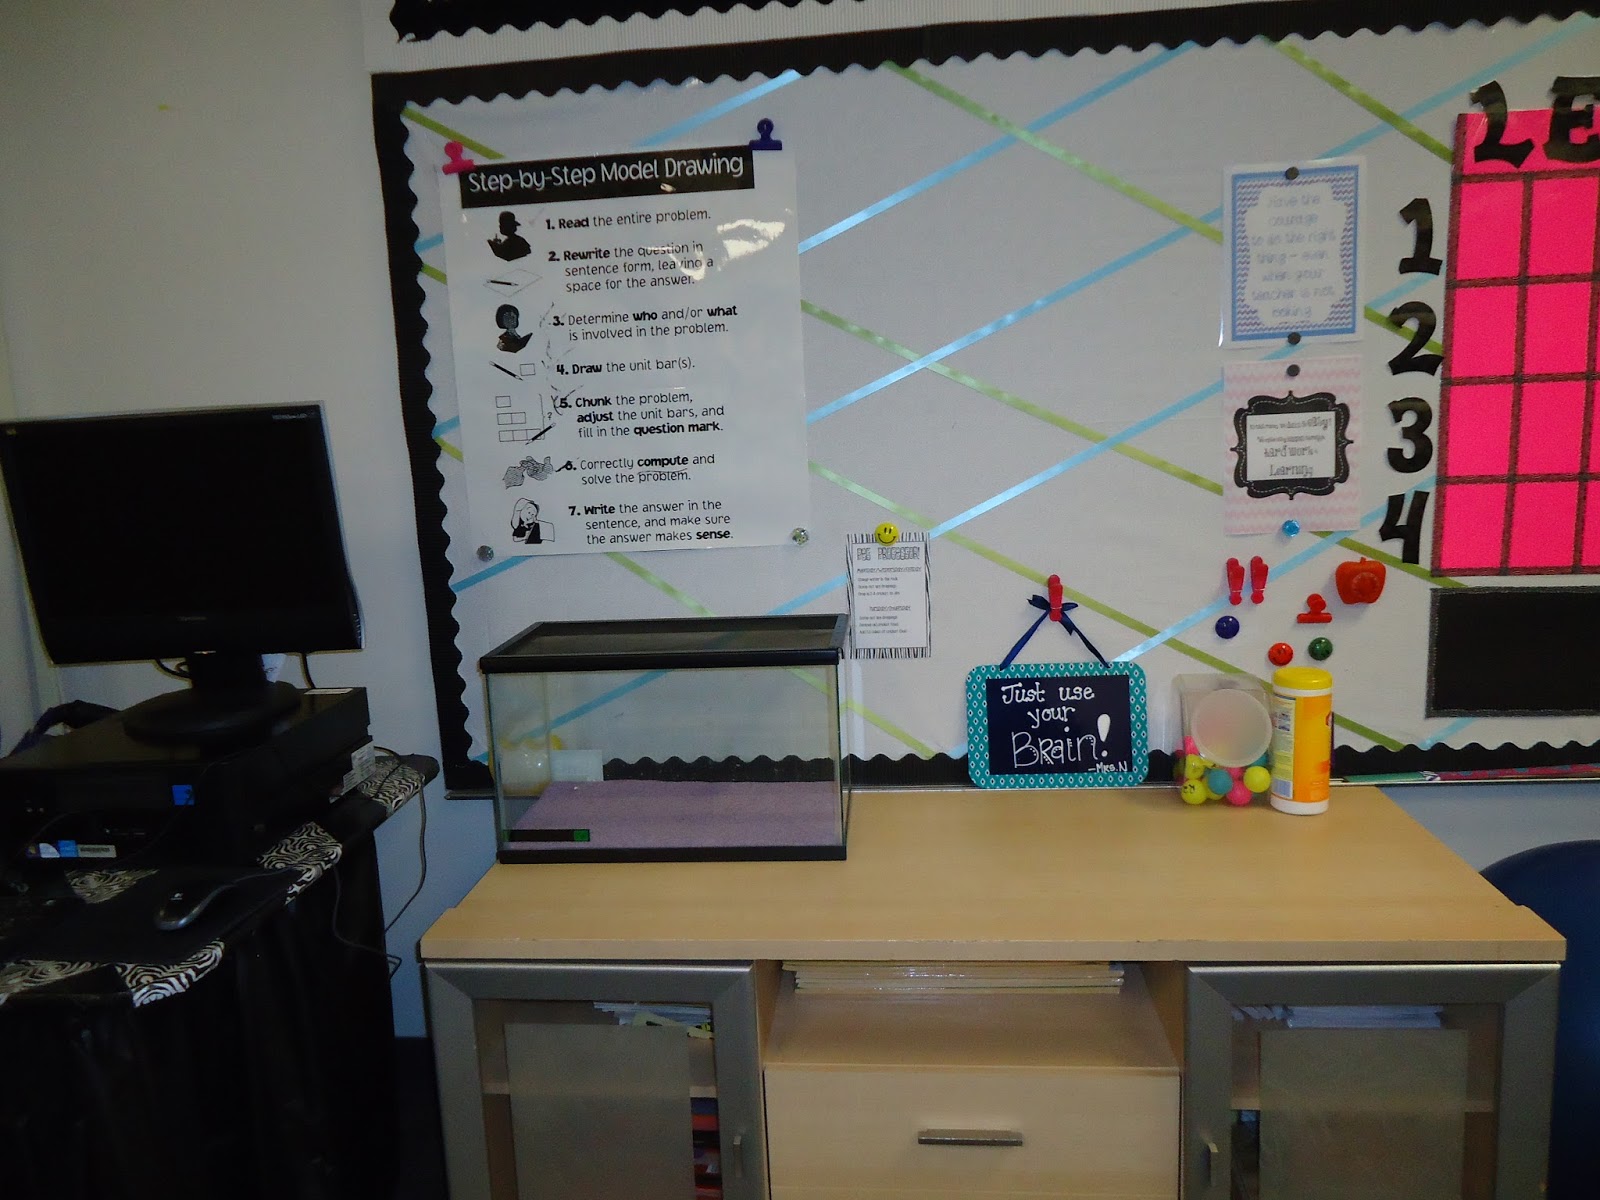
This is my whiteboard that I will use for my SWAG poster. ( Posting that when I have it made). MY objectives, and my instruction board.
Here is a close up of the instruction board. This was an idea off pinterest that I found really helpful! Those are the questions or instructions I constantly answer/repeat. Sooooo, I just check either side of the instruction before they get started so they know!
Moving counter clockwise still, my final wall. The lovely cabinet space we have.
This Star Student display is for my 6 wks honor roll and Super Bobcats!
KETCHUPS AND PICKLES display! Another pinterest find! If they owe any work a clip with their name will be under Ketchups. It even specifies what subject because they have two teachers.
My Weekly folders. This is where I pass back graded papers and they pick up on Wednesdays to go home. I also keep extra forms/informational flyers in the bottom pocket in case they need another one!
Another from the front. I have four tables.
This a view from the entry.
Now I know you noticed those lovely storage carts in the middle of every table. This is my first year to do supplies in this way so I'll keep you posted on how it goes. Here is a look at those.
A view of what sits on top. From left to right: trash can, pencil container. If you notice the toilet paper roll in the center that it where the SHARP pencils will be and the dull ones will be outside of it. NO MORE PENCIL SURFING! ( searching for a sharp pencil.) Then we have the tissue box and sanitizer behind that.
This is the labels on each drawer so it is a no brainer where the materials are.
Top drawer. I put colored tape around some of those supplies BECAUSE, they are only there to RENT. It is emergency supplies if someone forgot their stuff at home.. grrrrrrrrrrr. I will know if they are using the EMERGENCY stash because of the tape.
Middle drawer. Those great erasers are at the dollar tree. The big one is for whoever is the supply manager that week. ONLY THE SUPPLY MANAGER can access the entire supply cart. That way if it is messy, I know who to speak with.
That's it for now guys! Have fun getting your stuff ready. Let me know if you have any questions and I will be sure to post more soon. What do you think so far?????
Wednesday, July 24, 2013
QR Codes for class Coupon
I have welcomed technology folks! :) I created these QR codes to phase out my class lotto tickets. Coolest thing EVER! The Coupons graphics are made by THE 3AM TEACHER and The Teacher Chick! Here are some photos of my creations.


This is what the QR codes print out looks like. Be sure your device(smart phone, ipad, I pod 4th generation) has an actual QR scanner not just the barcode scanner. I was trying to use a barcode scanner it didn't work so well.

This is what comes up!

Here are all the coupons I made.
If you want them, you can get them here at my store.
When school starts, I will detail how I use it in my classroom and do a give away! Enjoy!
Friday, July 19, 2013
Mental Math Cards
Lining up, waiting for the restroom, waiting for specials, etc. The list goes on of down time you have and most of that time is spent on reiterating the rules and getting on to students who are just wiggly and bored. I then realized that if my schedule was cut down this year then vocabulary would be slightly difficult to practice. What a way to squeeze in those words that just don't stick with some kiddos... PRODUCT, QUOTIENT, SUM, DIFFERENCE, TIMES AS MANY. Here are my creations.


The Owls are mixed operations - ALL 4. The monsters are only add/subtract. Answers are available to print on back for yourself. You can get them here.
I am working on geometry mental math cards as well. I'll post once I've got them finished!I will probably be creating a master pack once I get the geometry done.
How do you manage those down time parts of the day?
Wednesday, July 17, 2013
Multiplication Quizzes... Problem Solved!!!
Happy Hump Day!
Okay I was surfing pinterest.. and found this genius idea! It is a way to do multiplication fact quizzes in your classroom as time efficiently as possible. I don't know about you but, I had to ALWAYS keep track of how many copies I needed and since the kids went at their own pace some days I would need 10 copies of X5 and I only had 4 because I forgot to make those copies! AHHHHH!
So I found this video by Suzy Brooks on Multiplying Mavens. She had the greatest idea to make these type quizzes.
Step 1:
Copy the quiz for a class set. ( I have two classes for math so I will copy two class sets and let each student take care of their own.)
Step 2:
Slip those pages into page protectors...TADA instant white board.
Then you have a teacher checklist and you are good to go. I am so excited to use this idea this year. I am still racking my brain to figure out how I can use it for mixed quizzes of multiplication and division. I'll keep you posted.
I don't like to separate out the operations because I want my kiddos to realize the important of understand their fact families to help them with division facts. Here is my version of the quiz.
 You can get it as a FREEBIE in my TPT store here.
What do you think? How do you do your fact quizzes in your classroom?
Okay I was surfing pinterest.. and found this genius idea! It is a way to do multiplication fact quizzes in your classroom as time efficiently as possible. I don't know about you but, I had to ALWAYS keep track of how many copies I needed and since the kids went at their own pace some days I would need 10 copies of X5 and I only had 4 because I forgot to make those copies! AHHHHH!
So I found this video by Suzy Brooks on Multiplying Mavens. She had the greatest idea to make these type quizzes.
Step 1:
Copy the quiz for a class set. ( I have two classes for math so I will copy two class sets and let each student take care of their own.)
Step 2:
Slip those pages into page protectors...TADA instant white board.
Then you have a teacher checklist and you are good to go. I am so excited to use this idea this year. I am still racking my brain to figure out how I can use it for mixed quizzes of multiplication and division. I'll keep you posted.
I don't like to separate out the operations because I want my kiddos to realize the important of understand their fact families to help them with division facts. Here is my version of the quiz.
What do you think? How do you do your fact quizzes in your classroom?
Tuesday, July 9, 2013
Make your own Supply box!
I don't know about you, but last year I had several different mismatching containers on my desk that held pens, markers, my pencils, staple removers. It was a CLUTTER DISASTER! So I found this idea on pinterest and altered it for my classroom.
 Here is the finished product!!!!

Here is the shoe box and fabric. I cut the fabric like this.

 This is how I set my glue dots on each side. then just started from the base of the shoe box and smoothed it over the glue dots.
 I put glue dots on the inside of the box and folded the fabric into the shoe box.
 The fabric doesn't go all the way down but it wont show once you have the toilet paper rolls in there.

 What do you think?? How do you organize yourself with those commonly used supplies that need to be within reach??
Here is the shoe box and fabric. I cut the fabric like this.
I used glue dots and tried hot glue. But you could do it mostly on glue dots! I had the mini glue dots, but the bigger ones would probably work better!
Then, I spray painted toilet paper rolls and hot glued them together and to the bottom of the box so they won't lift up when I pull pens and markers out. TADA! No more mismatching containers and jars.
Subscribe to:
Posts (Atom)